E-Chat Setup
1. Obtaining the Public HMS Service Address
The first step is to obtain a public address for HMS Service. This can be done in one of the following ways:
-
through Cloudflare. Depending on where the server is hosted, you will need to contact either our system administrator or the client's system administrator;
-
by opening the required port on the router.
Note: the local service address is stored in the appsettings.json file.
2. Checking Webhook Availability
After obtaining the public address, you need to verify that it is accessible.
Open a browser and go to:
https://your_public_address/api/echat/webhook
If the browser returns a JSON response, the service is working correctly.
3. Configuring Webhooks in the E-Chat Account
-
Sign in to your E-Chat account.
-
Click "Connect Number".
-
Enter the phone number.
-
Select the required messenger and choose the "API" integration.
-
Click "Add Number".
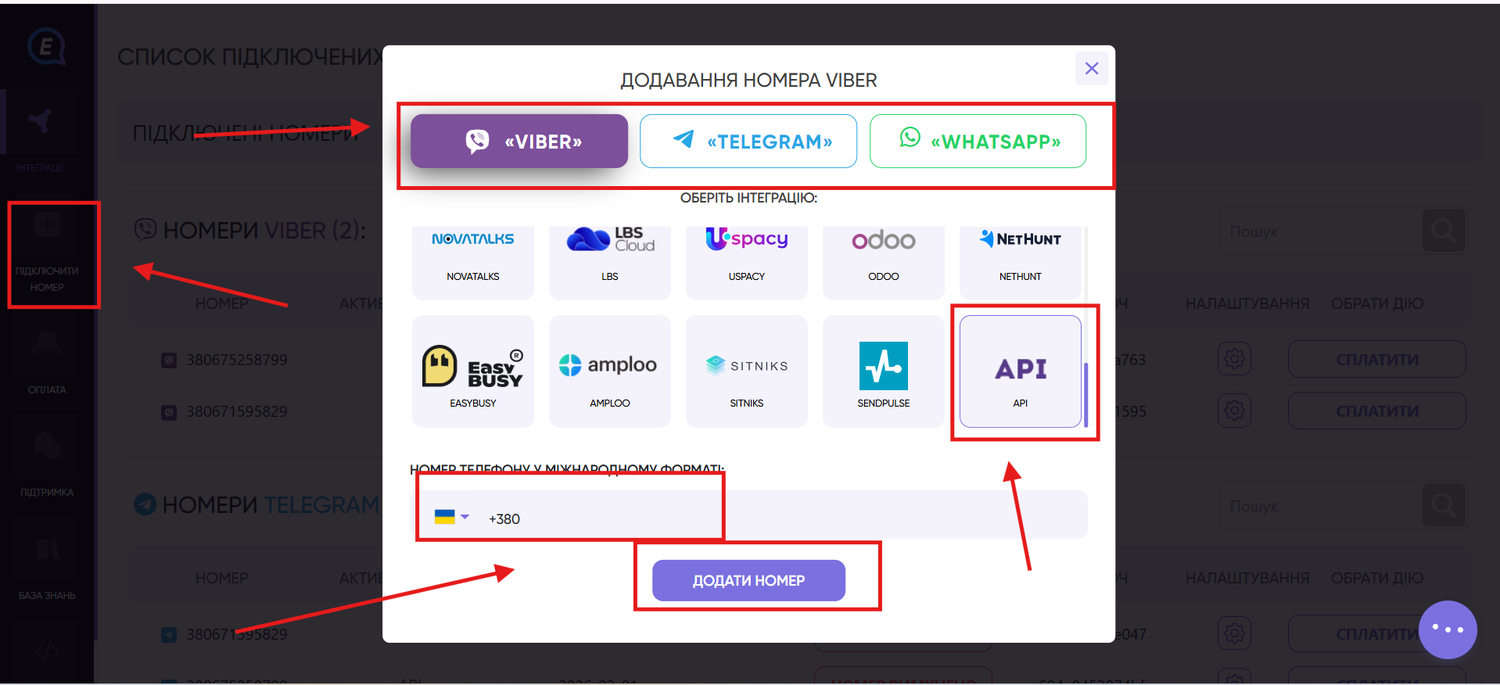

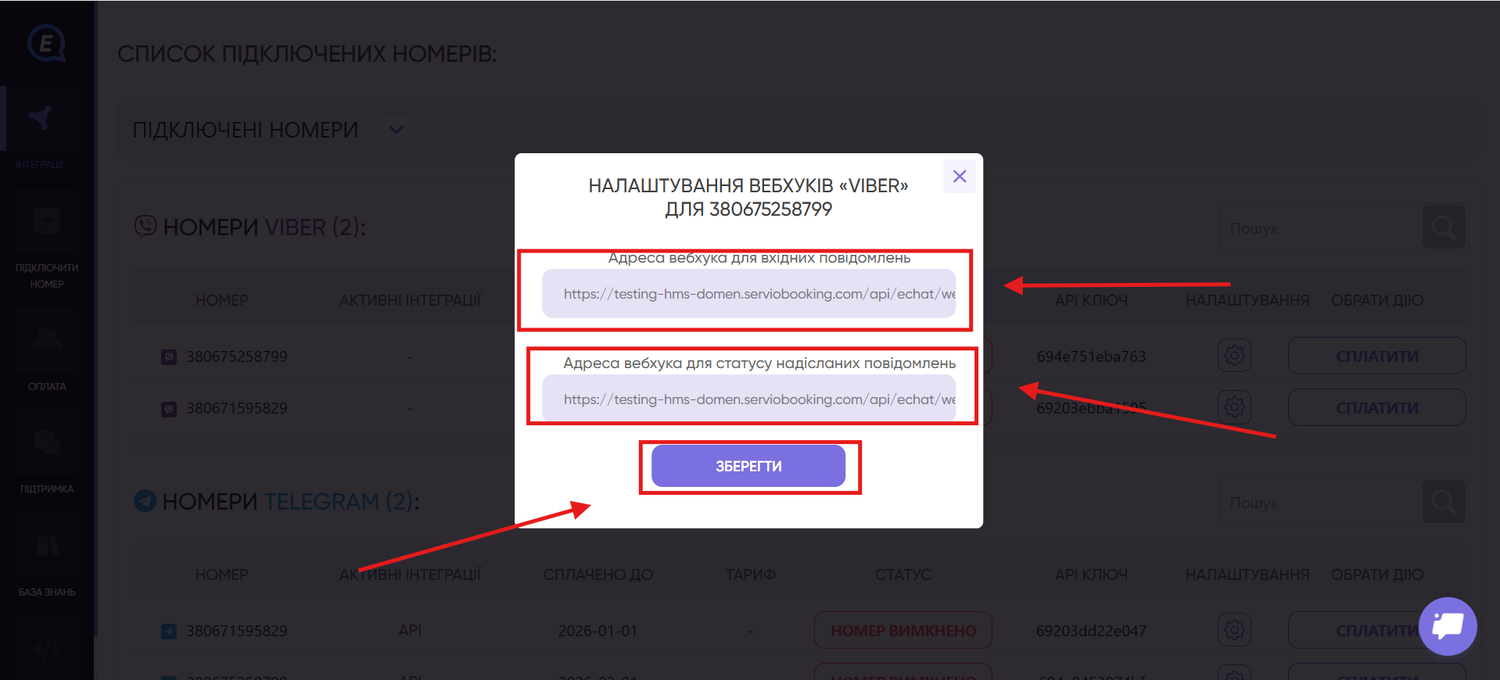
After adding the number, open the "Integrations" tab and go to the Webhook settings.
Complete the fields as follows:
INCOMING: webhook URL for incoming messages
https://your_public_address/api/echat/webhook/incoming
OUTGOING: webhook URL for sent message status updates
https://your_public_address/api/echat/webhook/outgoing-status
4. Configuring HMS

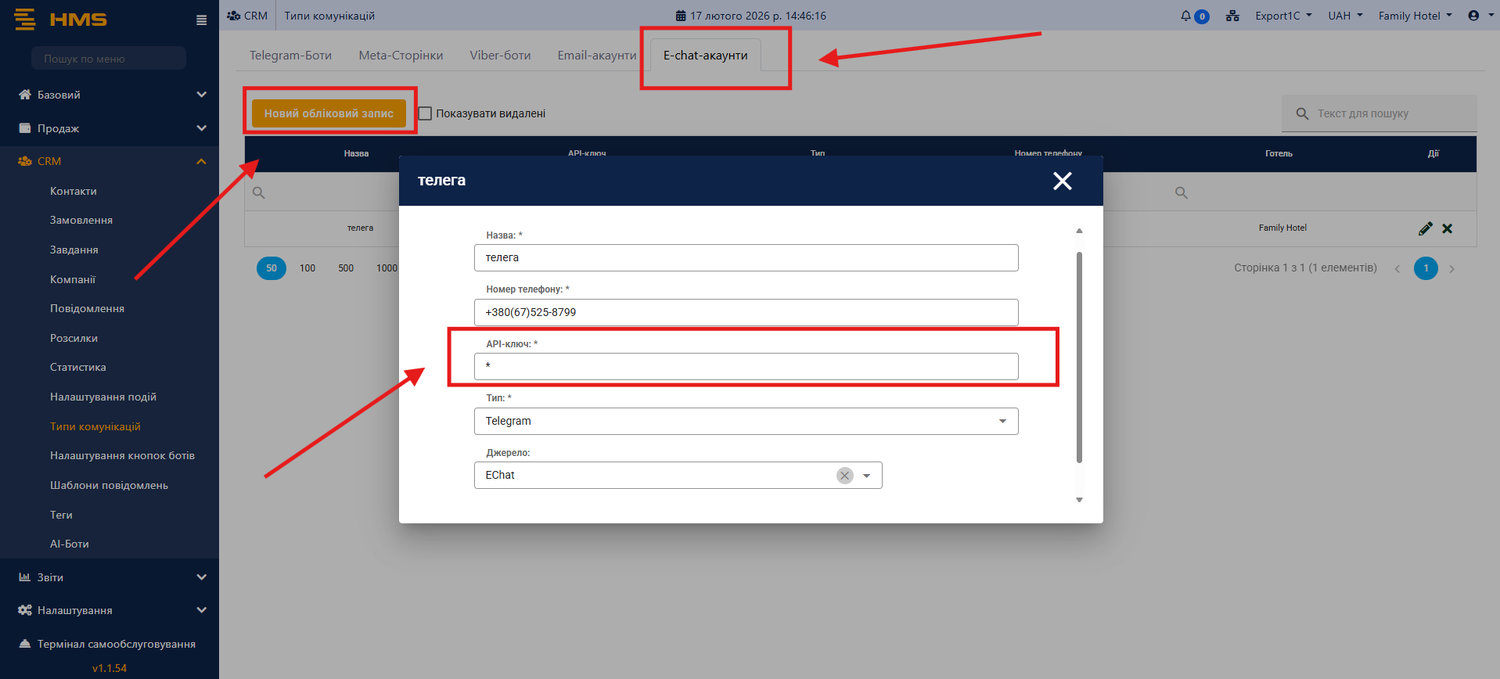
Sign in to HMS and go to:
CRM -> Communication Types -> E-Chat Accounts
Click "Add" and complete the required fields.
In the "API Key" field, enter the corresponding key from your E-Chat account.
Save the record.
5. Testing the Integration
After successfully adding the account:
-
Send a test message.
-
Make sure the message is processed correctly by the system.
If the message is sent successfully and appears in the system, the setup has been completed correctly.
