The installation instructions will look like this:
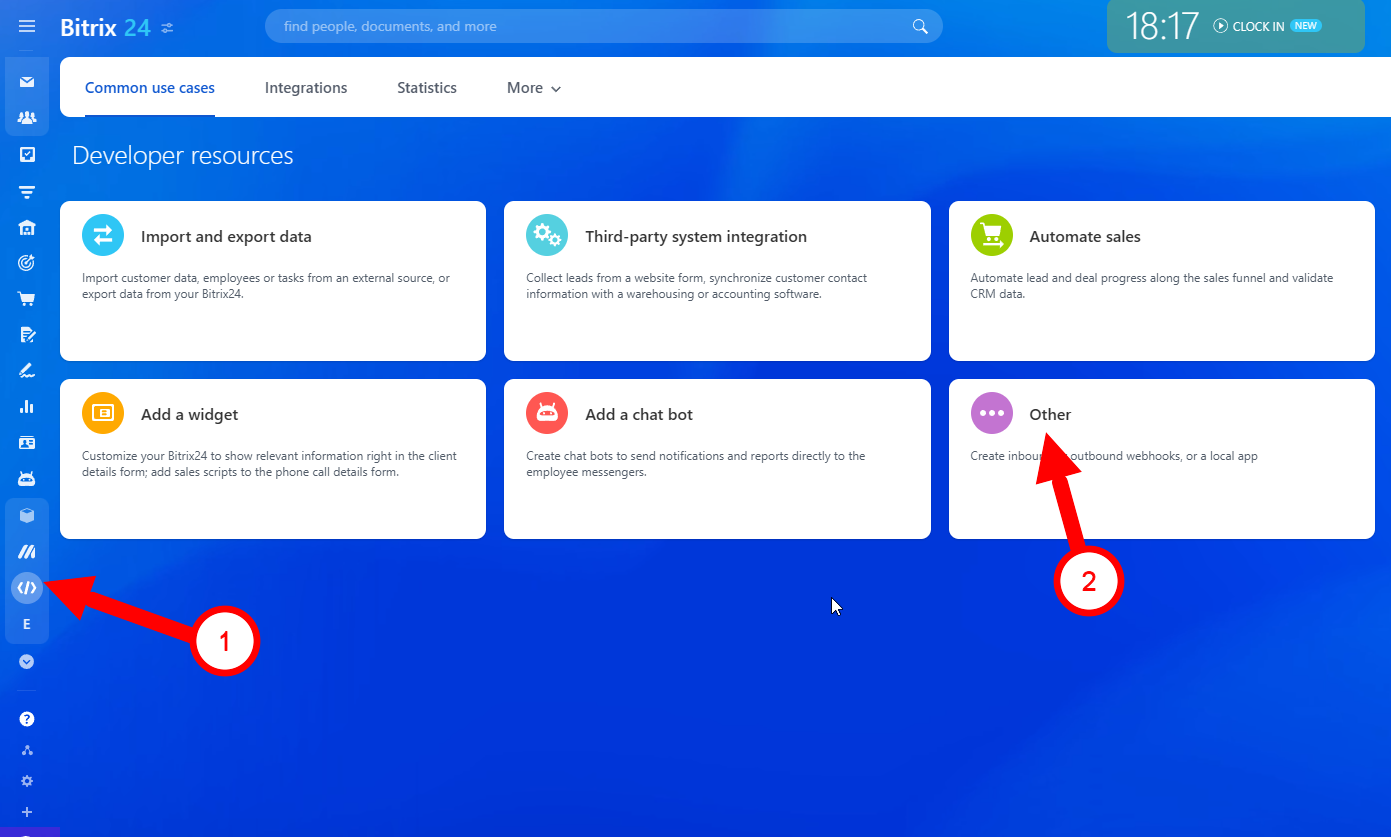
Go to the section “Developers resources” -> “Other” -> “Local application”.

1) In the window that opens, you need to enter the name of the service (to make it easier to find it later in the “Integrations” section).
2) In the “Your handler path” field, insert a value:
https://local-bitrix-app.e-chat.tech/index.php
3) In the “initial installation path” field, insert the value:
https://local-bitrix-app.e-chat.tech/installApp.php
4) In the field “Menu item text ...” you need to enter a value: E-chat.
5) In the section “Assign permissions” you need to specify the following items:
- -CRM
- -Data storage
- -Chat and notifications
- -Messaging service
- -Contact center
- -Users (minimum)
- -Open channels
- -Company structure
- -User custom fields
-application embedding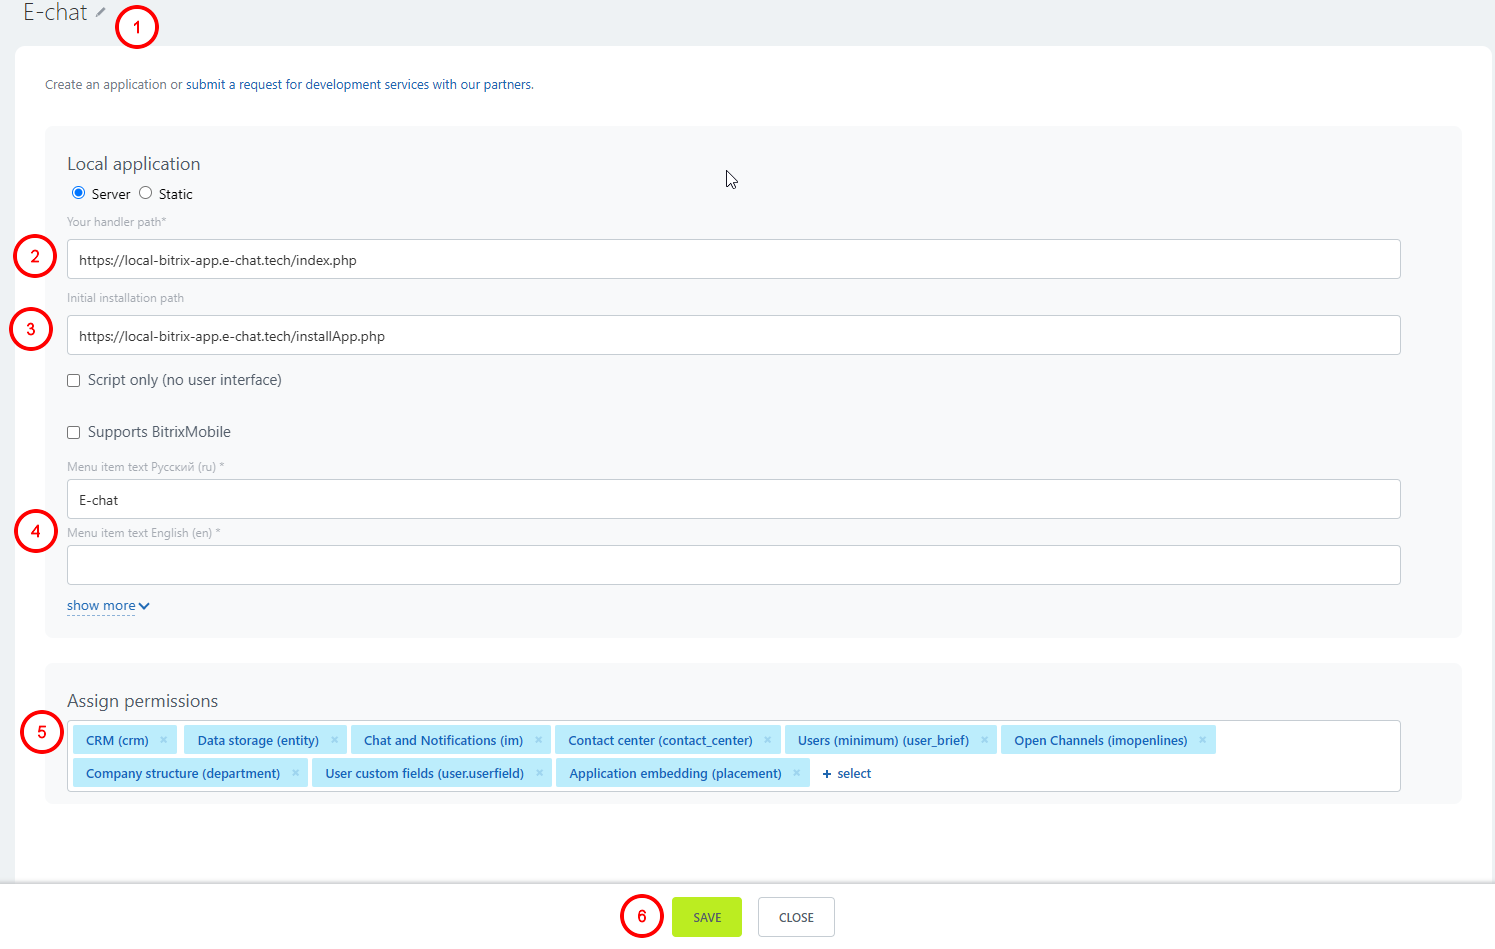
Click the “Save” button.
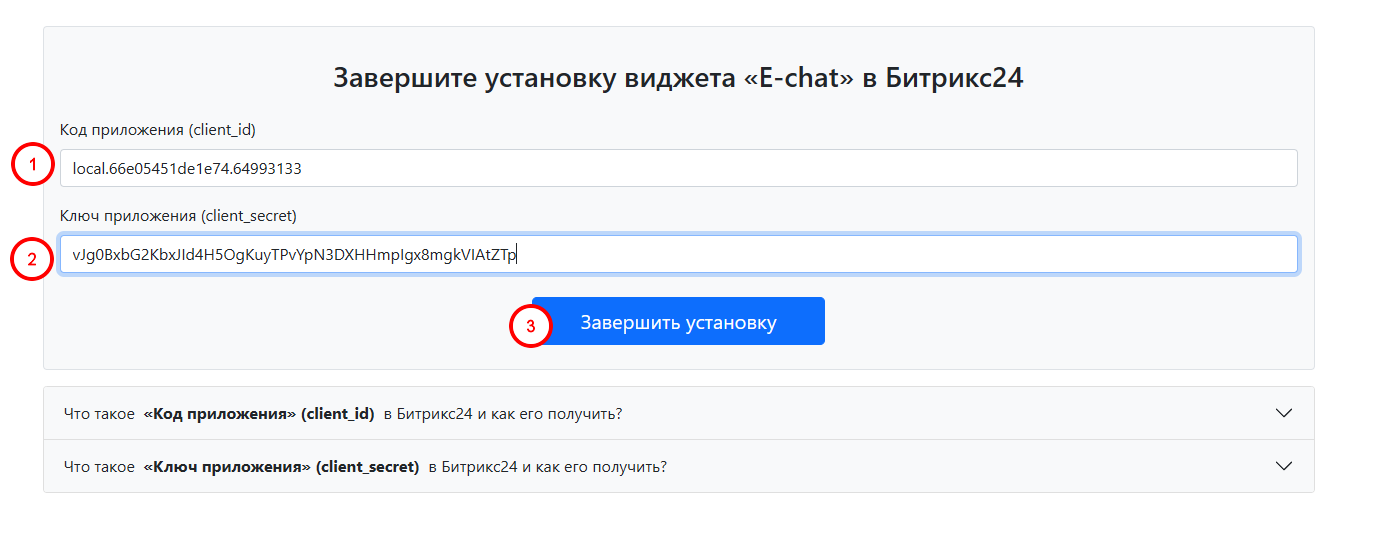
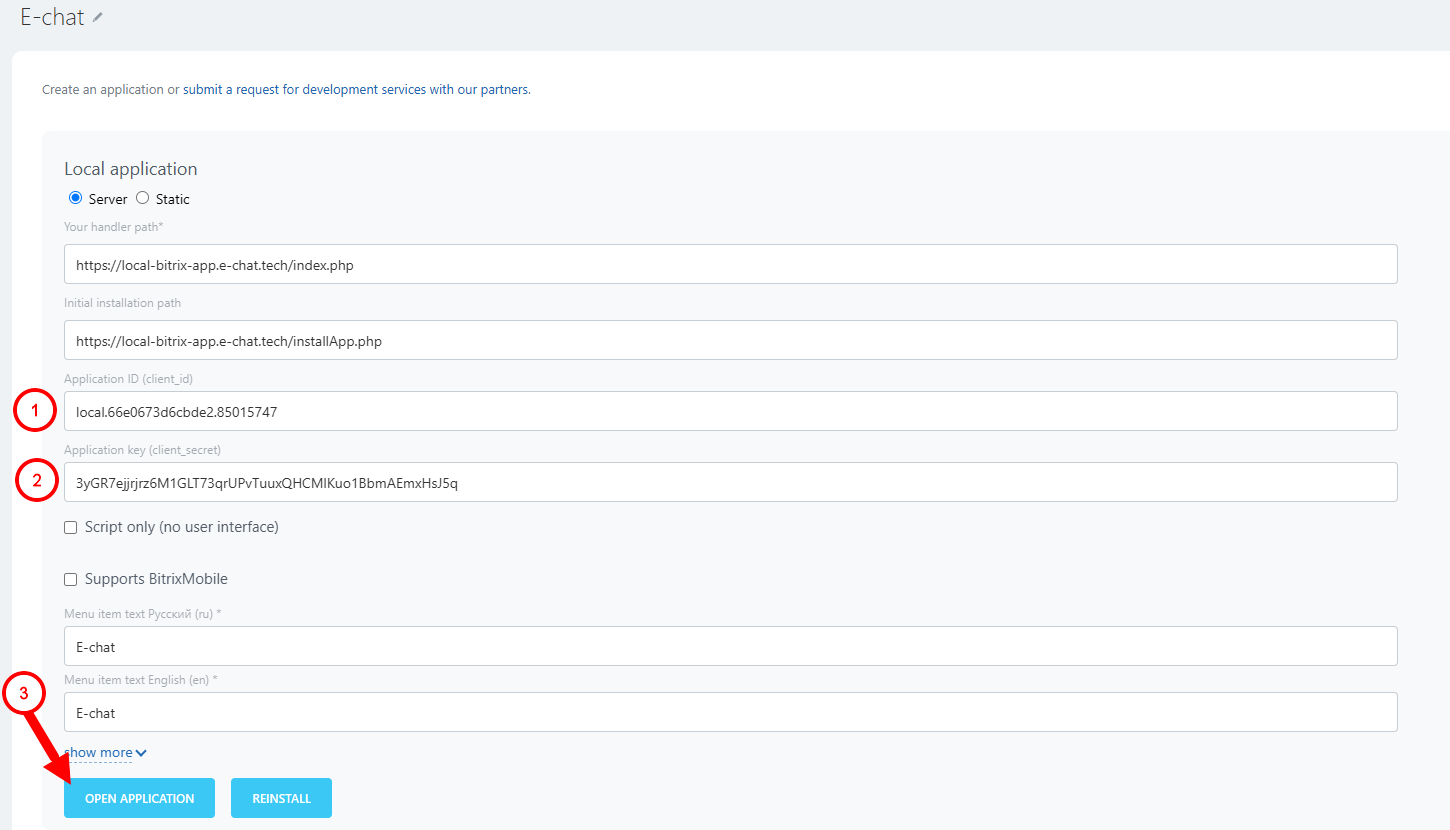
After you click the “Save” button, the form you were filling out will be updated and two new lines will appear:
1. Application code (client_id)
2. Application key (client_secret).
- You need to copy the data from these two lines, as you will need them for the widget.
3. Once you have copied this data, click on the blue “Go to application” button. This will open our widget, where you will need to enter the copied data.
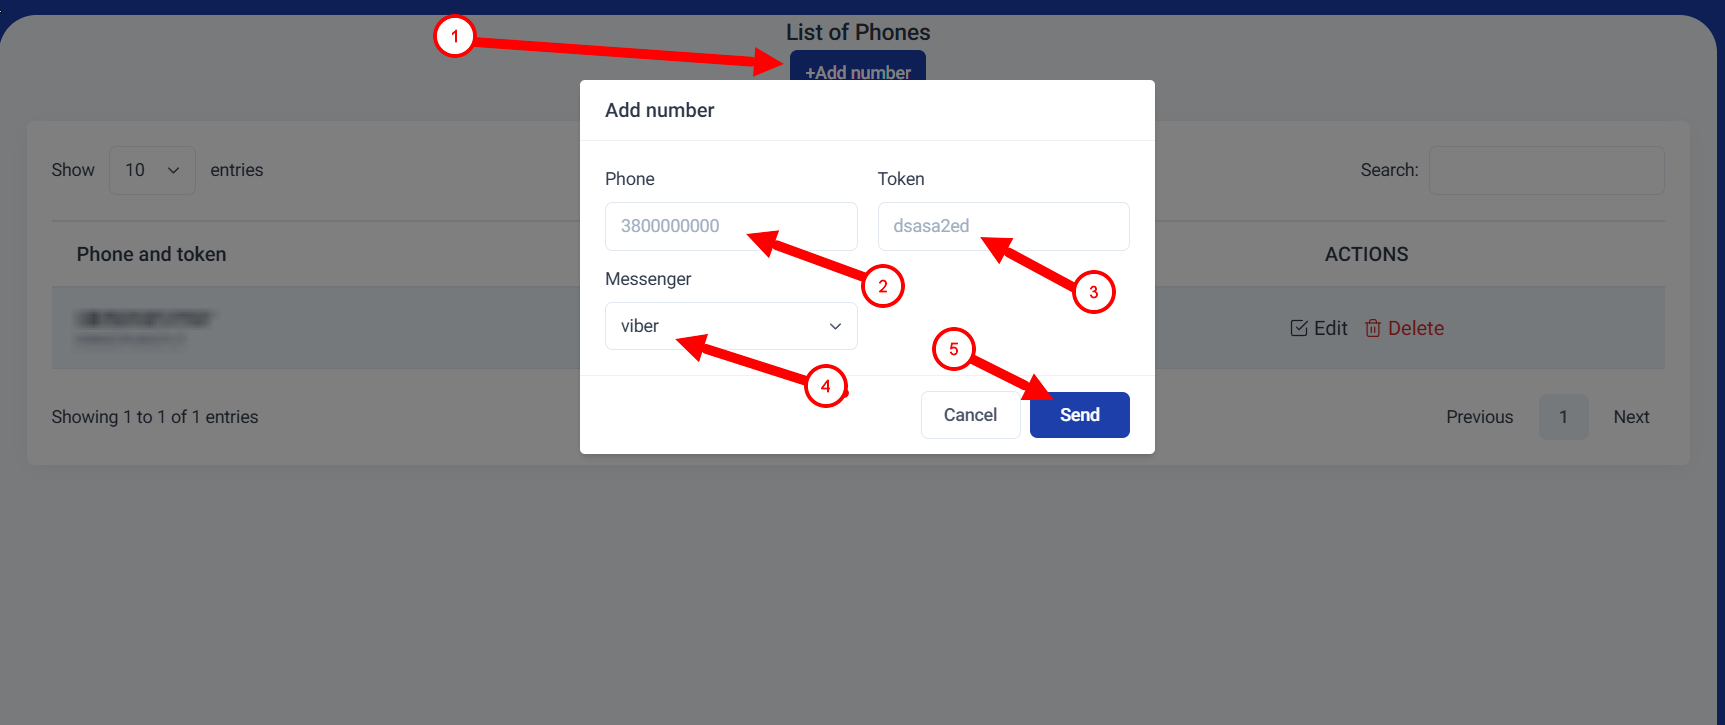
After entering the data and clicking on the complete installation button, you will see our widget where you can add a Viber or Telegram number.