To configure the integration, you need to go to the following section: "Settings - Configuration - Applications - Viber number"
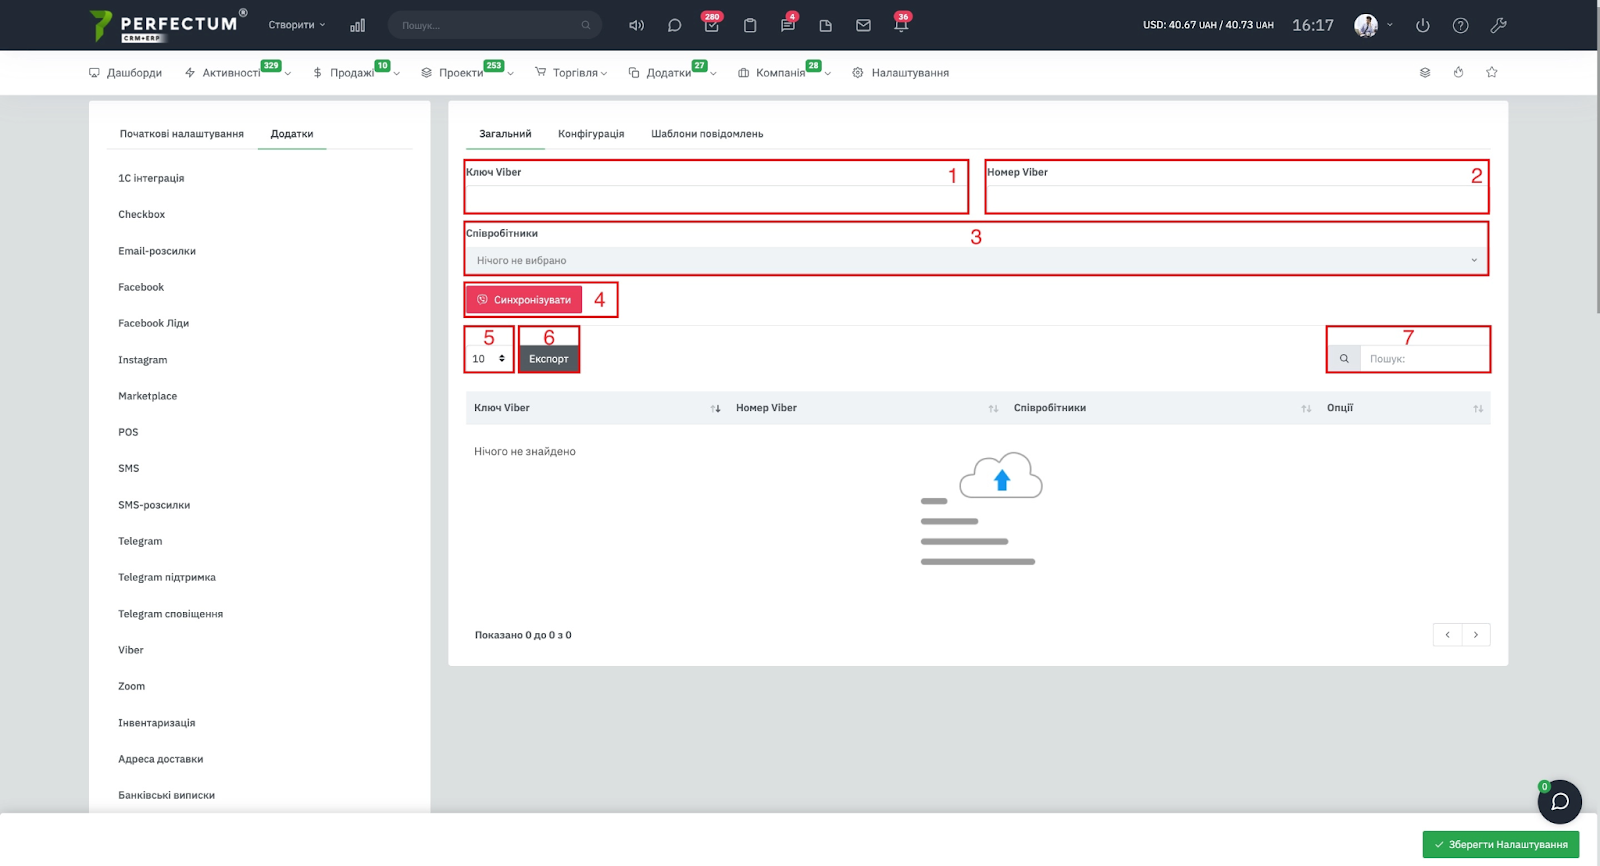
The General tab and its capabilities:
- Viber key - field to insert the key.
- Viber number - a field to insert a number.
- Employees field - allows you to select employees who need to be granted access to Numbered Viber.
- The "Synchronize" button - click after completing steps 1-3.
- Field for displaying the number of records on the page (10,25,50...).
- The "Export" button - to export the Viber numbering table.
- The "Search" column is used to search for synchronized Viber numbers by keywords.
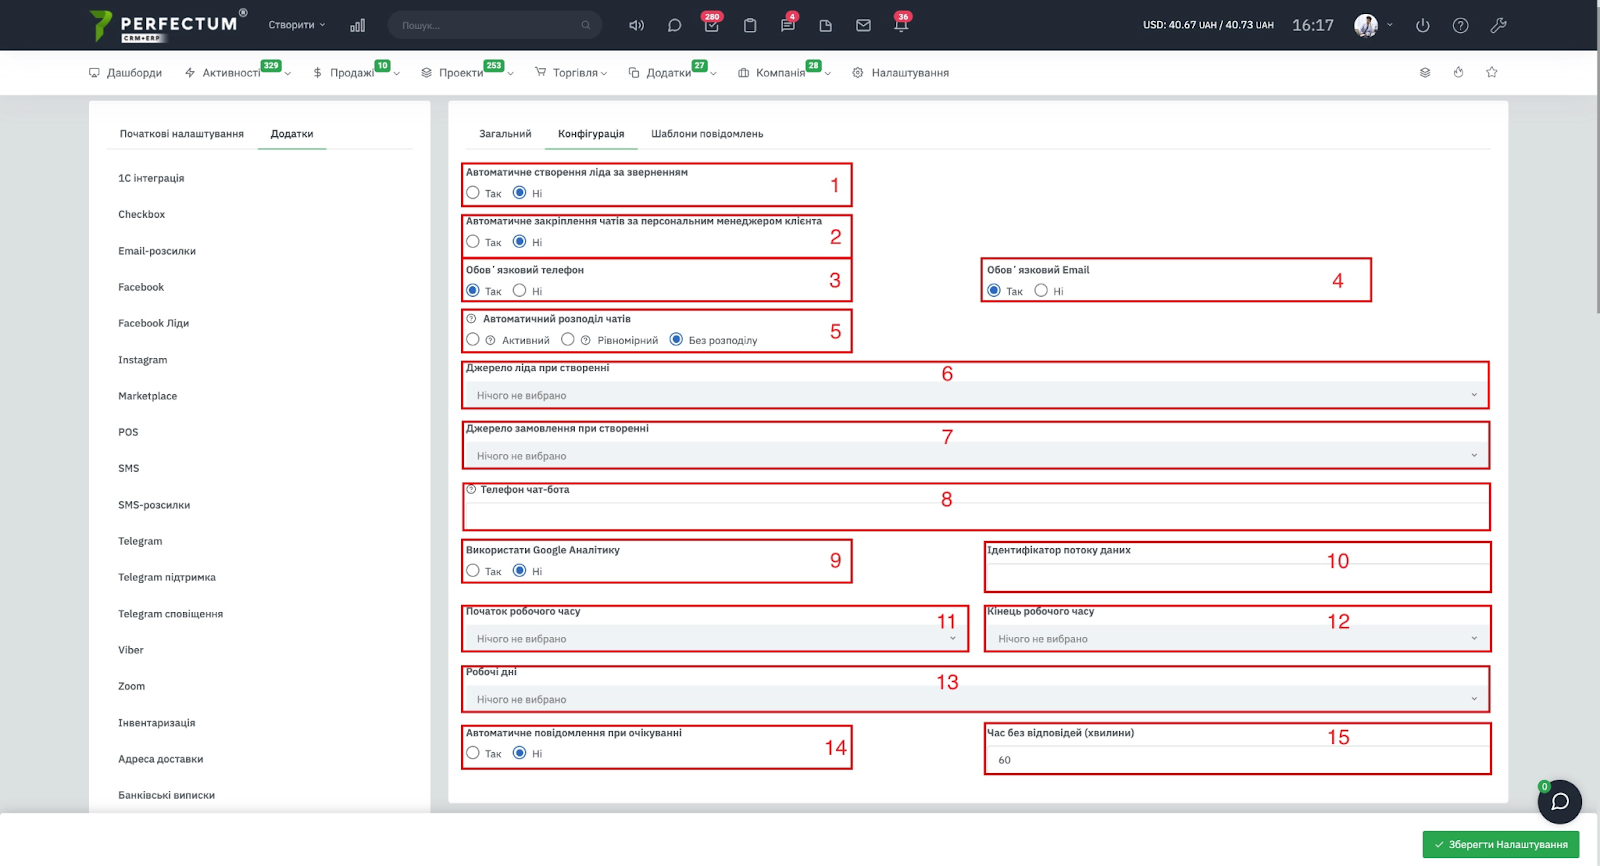
The Configuration tab and its capabilities:
- Automatic creation of a lead by request - yes/no. (each new chat will create a lead in the system).
- Automatic assignment of chats to a personal client manager - yes/no. (if you select "yes" and a client who has the same phone number or email as the client in the system writes to the chat, then a personal client manager will be assigned to this chat).
- Mandatory phone number - yes/no. (Before the client can write a request, the system will automatically ask for his phone number and indicate it in the chat).
- Mandatory email - yes/no. (before the customer can write a request, the system will automatically ask for their email address and indicate it in the chat).
- Automatic chat distribution - allows you to distribute chats between employees by parameters:
Active - the distribution goes to employees who are currently in the system (online). If there are no employees online at the moment, then the distribution is evenly distributed.
Uniform - the distribution goes to each employee evenly. (For example, 2 employees are online now and customers have written 10 chats, then 5 chats will be assigned to each employee). - Lead source when creating - select from the list.
- Source of the order when creating - select from the list.
- Chatbot phone number - enter the phone number required to generate a link in the Consultant.
- Use Google Analytics - yes/no
- Data stream ID - when using Google Analytics, enter the data stream ID in this field.
- Start of working hours - select the start time.
- End of working hours - select a time from the list.
- Working days - select from the list.
- Automatic notification when waiting - yes/no.
- Unanswered time (minutes) - specify the time without a response after which an automatic message will be sent to the client.
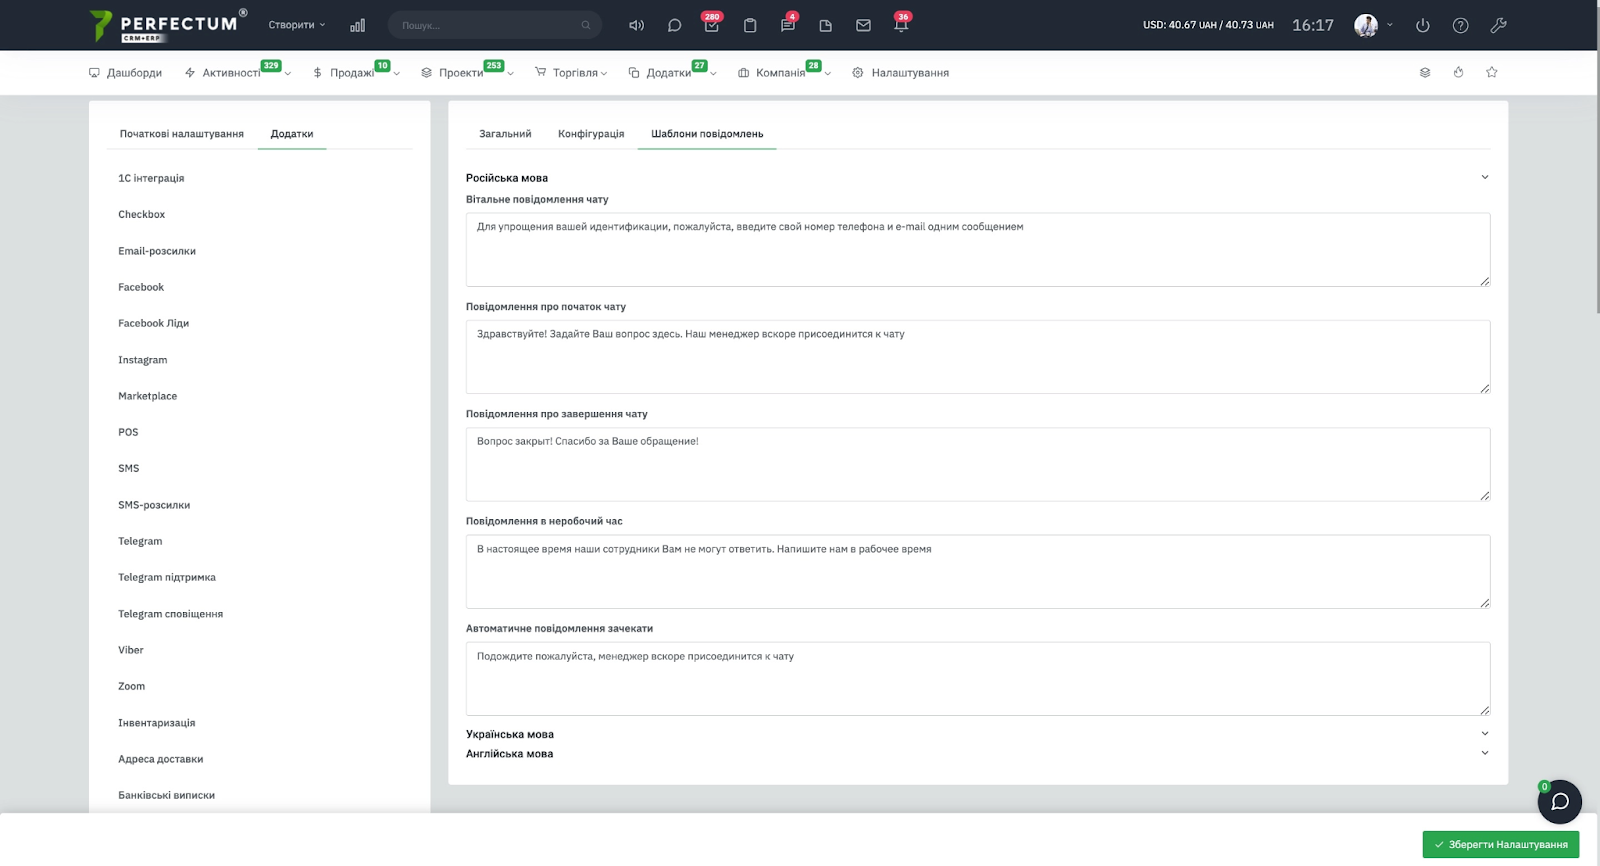
The Message templates tab and its features:
In this tab, you can customize the text of automatic messages in different languages to suit your needs.